Make a stack of L2 MODIS files
This lesson shows how to create a stack of MODIS L2 daily scenes, with geolocation and quality flags filtering. We will use a generic tool that can be used to stack a pile of grids in any of the formats read by Mirone. But this tool has a further knowledge about MODIS products that we will make use here.
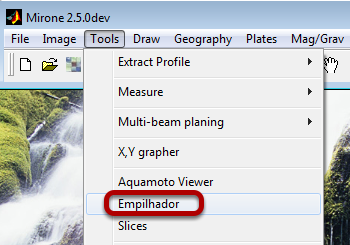
Open the stacking tool, which is called "Empilhador"
The Empilhador tool
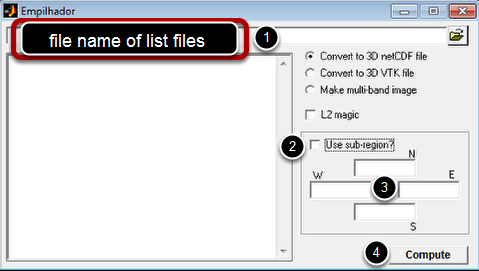
The generic use of this tool requires that we provide it with a list of files that will be stacked in a 3D multi-layered file.
- So, with a text editor we create an ascii file with the names of each file that will be part of the stack. That is step (1)
- In case we want to restrict the region to a smaller (than data contents) sub-region, check the checkbox (2)
- Fill the limits in (3)
- Hit compute in (4) and provide a file name for the output that will be asked.
Particular case of MODIS L2 files
However, the steps described above are not sufficient for the MODIS L2 files because one need to inform the program about further crucial information. Namely, the time of each scene, what variable to extract (chlorophyll, SST, etc...), grid resolution, flagging options.
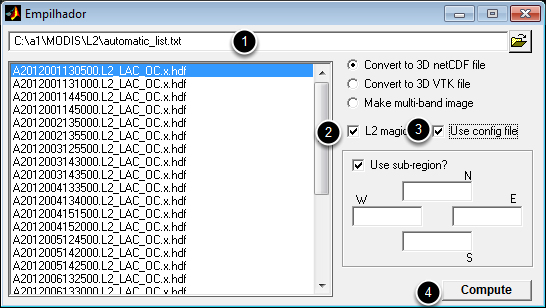
Since creating a list of files is cumbersome and error prone one can use a simpler mechanism to easier our lives. So assuming we have our files inside a directory named C:\a1\MODIS\L2\ and that the file names all start by 'A' and have .hdf as extension, enter the following line in the file name list edit box (WARNING: OF COURSE THE PATH TO THE DIRECTORY WHERE YOUR FILES RESIDE MUST BE ADAPTED FOR YOUR CASE)
C:\a1\MODIS\L2\A*.hdf ? -chlor_a
In the above the first field tells the files name, the question mark ? informs the program to decode the time from the files names and the -chlor_a selects the variable to extract. The chlorophyll a in this case.
If the info provided is correct, the above command automatically create a file with the names list and populate the scroll box with the file names.
Now check the checkboxes (2), to tell the program we are using L2 MODIS files; and (3) to tell it to seek the remaining info in a separate file
The L2config.txt file
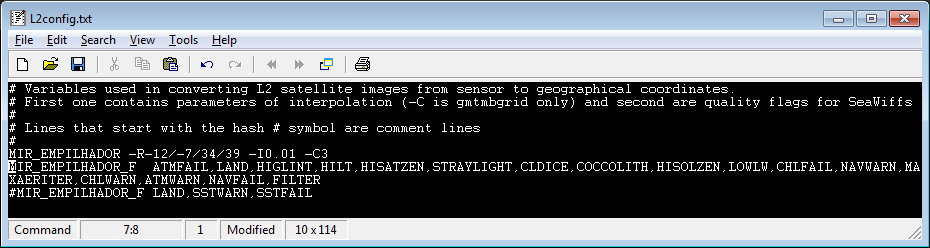
The point (3) in previous step actually tels the program to read a particular file called "L2config.txt" that is located in the 'data' subdirectory of the Mirone's installation directory. You must open that file with an text editor and edit if needed. The above figure shows an example of that file contents. It works by keywords ans lines starting by the '#' character are comment lines mean only for humans (the program ignores them)
- The MIR_EMPILHADOR key word tells the program to search here for the region of analysis in a form -Rwest/east/south/north, the grid step as -I<inc> and -Cn as a radius of influence. This syntax follows exactly the one used by GMT
- The MIR_EMPILHADOR_F informs the program about the flags used to filter bad or non reliable data. I wont explain here the meaning of those flags as they are explained in detail in the official "Ocean_Level-2_Data_Products.pdf" document.
When user hits "Compute" in previous step the program scans this file for the parameters, read all the L2 files, extracts the requested info, interpolates to the selected region and resolution and finally stores the result in a single 3D netCDF file. That file can be visualized and further processed with the help of the "Slides" tool, but that's a different lesson.